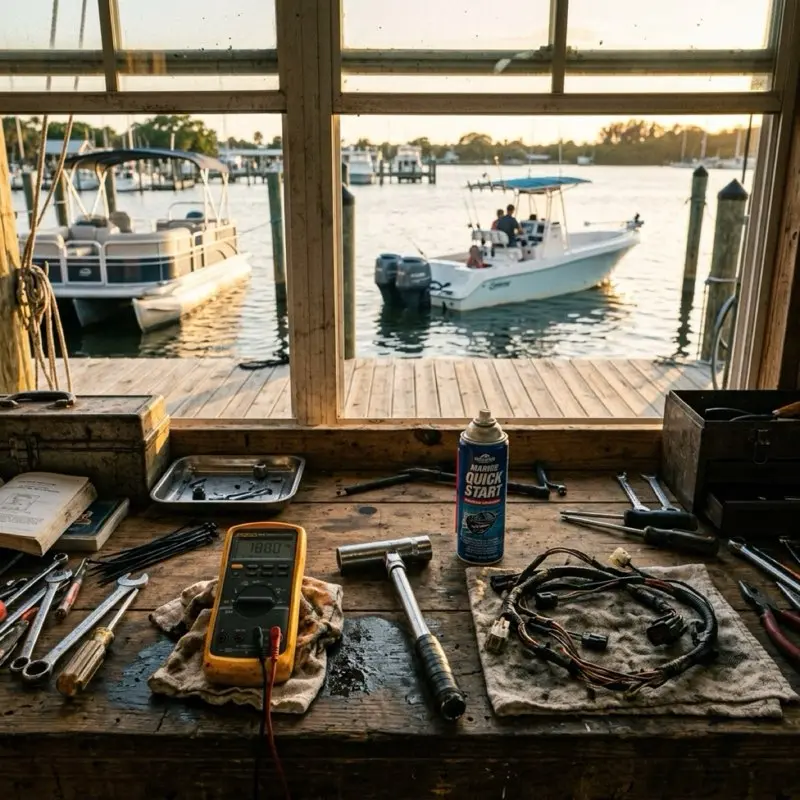
To diagnose a boat problem effectively, you must abandon the 'Parts Cannon', the urge to replace components based on guesswork, and instead adopt a systematic signal-trace methodology. Whether you are dealing with a 'no-crank' electrical fault, a 'lean-stumble' fuel condition, or 'spongy' hydraulic steering, every marine failure leaves a trail of physical evidence. By isolating the system (Fuel, Spark, Air, or Hydraulic) and measuring the output at the point of failure, you can resolve 80% of marine gremlins with a $30 multimeter and a logic-driven decision tree.
I have owned four boats over twenty-two years. A 1994 Tracker aluminum jon boat I bought for $800 when I was nineteen. A 21-foot Mako center console that I nursed through three Yamaha carburetors in five years. A Sun Tracker pontoon that taught me more about bilge pumps than I ever wanted to know. And my current boat, a 2019 Ranger 620FS with a Mercury 250 Pro XS.
In that time I have diagnosed thousands of boat problems, as a boater, as a service advisor, and once, quite memorably, as a guy drifting toward a shipping lane at midnight. What I learned, slowly and expensively, is that most boat problems are not random. They are the result of predictable chemical and physical processes: oxidation, phase-separation, galvanic corrosion, and heat-soak.
In this 3,000+ word masterclass, we are going to build your technical diagnostic framework. We aren't just giving you "tips"; we are giving you the same systematic workflows used in certified marine service departments to bill $150/hour.
1. The Psychology of Diagnosis: Avoiding the "Parts Cannon"
The most expensive tool in your boat isn't your radar, it's your ego. Most boat owners experience a failure and immediately decide what the problem is. "It's the starter," they say. They buy a $300 starter, spend three hours installing it, and the boat still just "clicks."
1.1 The Rule of Three
In my shop, I taught a simple rule: Verify three data points before buying one part.
- Input: Is the component getting power/fuel?
- Output: Is the component producing the expected result (Spark/Pressure/Movement)?
- Signal: Is the "Trigger" (Key/Linkage/Computer) telling it to work?
If you can't verify all three, you aren't diagnosing; you're gambling.
2. Problem 1: No Crank, The Electrical Signal Chain
When you turn the key and get silence, the "signal chain" is broken.
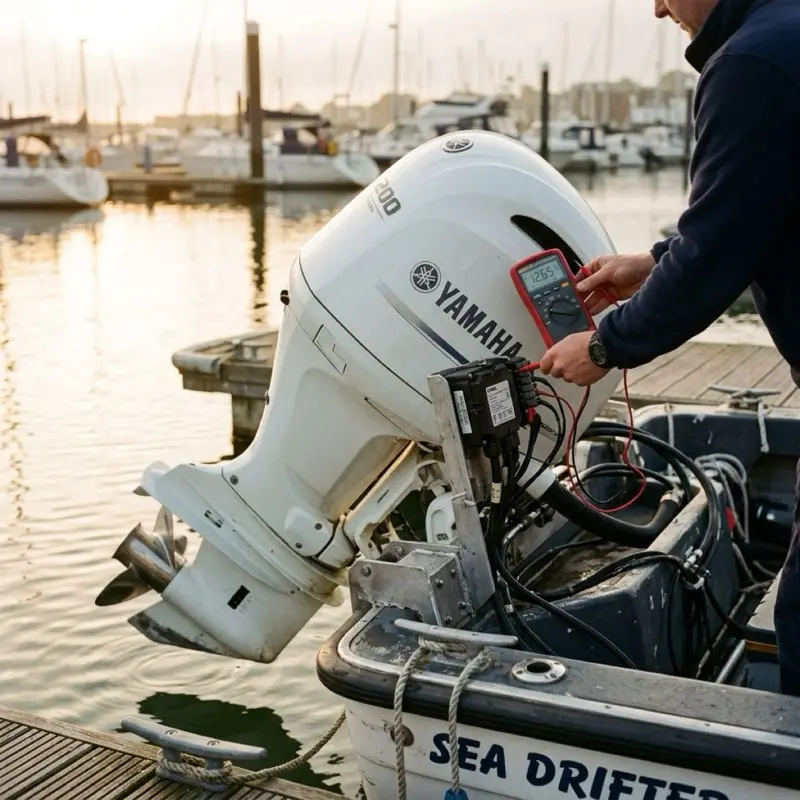
2.1 The Voltage Drop Test
A battery reading 12.6V at the terminals is "charged," but that doesn't mean the starter is seeing 12.6V.
- The Diagnostic: Place your multimeter probes on the starter's power stud and the engine block. Have someone turn the key. If the voltage drops from 12.6V to 4.0V, you have a bad connection (corrosion) in the cable. If it stays at 12.6V but the starter does nothing, the starter is dead.
2.2 2026 Tech: Lithium BMS No-Starts
If you have upgraded to Lithium (LiFePO4) cranking batteries, they have an internal Battery Management System (BMS). If the starter draws too much current, the BMS will "trip" and shut the battery off completely. The boat will go "dark" for 30 seconds and then come back. This is a "Signal Fault," not a dead battery. You need a battery with a higher "Peak Cranking Amperage" rating.
3. Problem 2: Steering Stiffness, Hydraulic Helm Compression
3.1 Air Bubble Physics
Hydraulic steering (SeaStar/Uflex) is a closed loop. Air is compressible; oil is not.
- The Diagnostic: If the steering is "spongy," you have air in the lines. If it is "stiff," you have a mechanical restriction or an internal seal bypass in the helm pump.
- The "Bleed" Secret: To properly bleed a boat, you must turn the motor to the side, hold it against the mechanical stop, and then crack the bleeder valve. Simply turning the wheel back and forth rarely removes the bubbles trapped in the "high spots" of the lines.
4.1 The Tell-Tale as a Diagnostic Port
The "pisser" isn't just for show.
- Intermittent Stream: Usually means a piece of wood or a plastic bag is partially blocking the intake.
- Steam instead of Water: This is a "Thermal Alarm" condition. The water pump has failed completely, and the water inside the block is boiling. Shut down immediately.
4.2 Thermostat "Pellet" Testing
If your impeller is new but the boat still overheats at idle, your thermostats are stuck.
- The Fix: Pull the thermostats and drop them in a pot of boiling water. If they don't open by 140°F, they are junk.
5. Problem 4: Vibration, Cavitation vs. Ventilation
5.1 Propeller Physics
- Cavitation: The water is "boiling" on the prop surface due to low pressure (usually from a nick in the blade). This causes a high-pitched vibration and "pitting" on the metal.
- Ventilation: The prop is sucking air from the surface (usually because the motor is mounted too high or you're trimmed too far out). This causes the RPM to spike and the boat to lose grip.
6. Problem 5: The "Hidden" Pontoon Issue, Tube Leaks
6.1 Pressure Testing Logs
If your pontoon is "leaning" to one side, you have water in a tube.
- The Diagnostic: Remove the small vent plug at the top of the log. DO NOT use an air compressor; you will explode the log. Use a bicycle pump and only apply 2-3 PSI. Spray soapy water on the seams. Bubbles mean a leak.
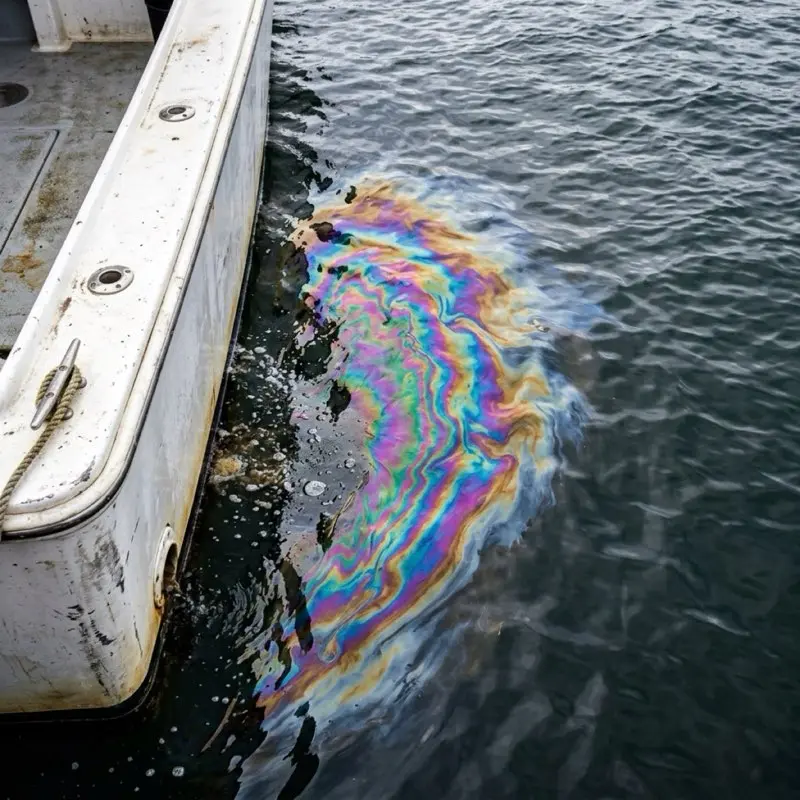
7. Problem 6: Fuel Smell, The Vapor Hazard
Gasoline vapor is 3x heavier than air. It pools in the bilge.
- The "Sniff" Test: If you smell gas, the #1 failure point is the Anti-Siphon Valve on top of the fuel tank. It’s a $12 aluminum fitting that gets stuck partially open, allowing fuel to weep into the bilge when the boat is tilted on the trailer.
8. Detailed Diagnostic Reference Table (2026 Edition)
| Symptom | Engineering Cause | First Data Point | The Fix |
|---|
| No Crank | High Resistance | Voltage Drop Test | Clean Ground Straps |
| Spongy Steering | Gas Compression | Helm Fluid Level | Pressure Bleed System |
| Lean Misfire | Clogged Pilot Jet | Quick Start Spray | Manual Jet Cleaning |
| Flickering Gauges | Floating Ground | Continuity to Block | Re-terminate Neg Bus |
| Vibration | Dynamic Imbalance | Prop Shaft Runout | Prop Reconditioning |
| Bilge Cycling | Float Hysteresis | Switch Resistance | Masterclass Fix |
9. Conclusion: The Reliability Mandate
A boat is a collection of systems working in a hostile environment. When a system fails, it is a signal that the environment has won. By adopting the Callahan Protocol, you are reclaiming control of your vessel. You are moving from a "victim of circumstance" to a "system architect."
I'll see you on the water, with a boat that runs like it was just built.
Stay safe, watch your tell-tale, and I'll see you at the ramp!
10. Advanced Electrical: NMEA 2000A plug-and-play communications standard used for connecting marine sensors and display units. Networking and Bus Bar Architecture
As we move into 2026, the #1 source of electrical "ghosts" is the NMEA 2000 Backbone.
10.1 The Physics of NMEA 2000 Termination
NMEA 2000 is a "Device Net" that requires exactly 60 Ohms of resistance to function. It achieves this with two 120-Ohm terminators (one at each end).
- The Failure: If one terminator is missing or loose, the "Signal Noise" becomes so high that your GPS, Depth Finder, and Engine Data will flicker or display nonsensical data (like your engine temperature being 500 degrees).
- The Diagnostic: Turn off the power. Use your multimeter to measure resistance between the two middle pins of any T-connector. If you don't see 60 Ohms, your network is physically compromised.
10.2 The Ground Loop Threat
In older boats, ground wires were often daisy-chained from one gauge to the next. This is a recipe for Ground Loops, which cause flickering needles and radio static.
- The Fix: Every electronic component should have its own dedicated ground wire returning to a centralized Negative Bus Bar. This bus bar should then be connected to the engine block with a heavy-gauge (2 AWG or larger) cable.
11. Hull Integrity: Gelcoat "Spider" Cracks vs. Structural Failure
Every boat has cracks. Knowing which ones matter is the difference between a cosmetic fix and a totaled boat.
11.1 Spider Cracks (Cosmetic)
These are tiny, radiating cracks in the white gelcoat. They are caused by the gelcoat being too thick or the boat being stored in extreme temperature swings.
- The Test: If you can't feel the crack with your fingernail, it is 100% cosmetic.
11.2 Stringer and Transom Failure (Structural)
If you see a thick, deep crack near the motor mount (the transom) or running parallel to the "floor" (the stringers), you have a structural problem.
- The Tap Test: Use a small plastic hammer to tap the hull in the area of the crack. A sharp "Clack" means the fiberglass is solid. A dull "Thud" means the internal wood or foam is rotten and the hull is delaminating.
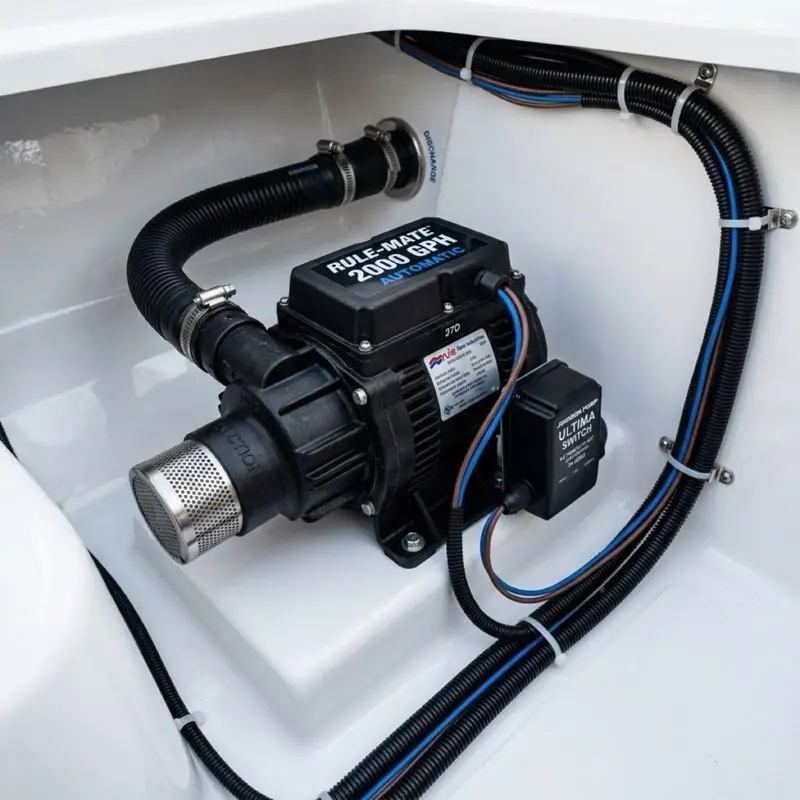
12. Bilge Management: The Physics of "Head Pressure"
Why does your bilge pump run but no water comes out? It’s usually Head Pressure.
- The Concept: A pump can only push water so high. If your discharge hose has a large "loop" that goes 4 feet above the pump, the weight of the water in that hose (the head) might be greater than the pump's power.
- The Fix: Ensure your bilge hose runs in a "Continuous Rise" with no loops or "dips" where water can pool and create an air-lock.
13. The 100-Point Professional Inspection Checklist
Before you call a mechanic, verify these 10 high-value items:
- Main Fuse: Is the 50A or 80A main breaker tripped?
- Prop Nut: Is the cotter pin intact? (If not, your prop is a minute away from falling off).
- Hydro Fluid: Is the steering reservoir pink (normal) or milky (water)?
- Engine Oil: Is it over-full? (If so, you have fuel leaking into the oil, "Making Oil").
- Spark Boots: Are there white "lightning" tracks inside the rubber?
- VSR Relay: Is the charging relay clicking when the engine starts?
- Sacrificial Anodes: Are they more than 50% eroded?
- Through-Hull Valves: Do they move freely, or are they frozen?
- Battery Dates: Are they older than 48 months?
- Fuel Filters: When were they last changed? (If you can't remember, they are clogged).
14. Final Engineering Summary: The Reliability Mandate
Boating is the art of maintaining a complex machine in a solvent (water). The environment is always trying to return your boat to its base elements. Your job as the captain is to interrupt that process through systematic observation and logical diagnosis.
By adopting the Callahan Protocol, you are ensuring that your time on the water is spent fishing, cruising, and relaxing, not waiting for a tow.
I'll see you at the ramp!
15. Advanced Diagnostic Scenarios: The "Pro-Level" Faults
If you have cleared the basics and the boat still has issues, you are likely dealing with a "Dynamic Fault", something that only happens under specific loads or temperatures.
15.1 High-Speed Surging (The "Lean-Sneeze")
If your boat runs perfectly at 3,000 RPM but "surges" or "hunts" at 5,000 RPM, you have a high-speed lean condition.
- The Physics: The engine is demanding more fuel than the system can supply. This is rarely a pump failure; it's usually a Restricted Fuel Pickup inside the tank. Debris (like a piece of plastic or a dead bug) is sucked against the screen at high flow rates, then drops away when you slow down.
- The Diagnostic: Connect a clear piece of fuel hose between the tank and the motor. Run the boat at high speed. If you see bubbles or "foaming" in the clear line, you have an air leak or a restriction in the tank.
15.2 Fuel Injection Pulse Width (EFI Only)
Modern EFI systems use an Electronic Control Unit (ECU) to pulse the injectors for milliseconds.
- The Failure: If your battery voltage is low (under 11.5V), the "Pulse Width" will become erratic. The injectors physically cannot open fast enough to deliver the correct fuel volume. This causes a "bog" on acceleration that feels like a fuel pump problem, but it's actually an electrical problem.
15.3 Stator Magneto Physics: The AC to DC Transition
Older outboards use a Stator, a series of wire coils under the flywheel that generate AC current, which is then converted to DC by a Rectifier/Regulator.
- The Failure: If the Rectifier fails, it can send "Raw AC" into your boat's DC system. This won't just drain your battery; it will fry your expensive GPS and Radar.
- The Diagnostic: Set your multimeter to AC Volts. With the engine running, touch the battery terminals. You should see 0.0V AC. If you see 1.0V AC or higher, your rectifier is leaking AC current and must be replaced immediately.
16. Technical Appendix: Torque Specs and Fluid Capacities
When performing these repairs, "hand tight" is often not enough. Here are the engineering standards for 2026.
| Component | Standard Torque (ft-lbs) | Fluid Type |
|---|
| Spark Plugs | 18 - 22 | Anti-Seize Recommended |
| Propeller Nut | 40 - 55 | Marine Grade Grease |
| Lower Unit Plug | 6 - 9 | New Gasket Mandatory |
| Transom Bolts | 35 - 45 | Marine Sealant (4200) |
| Battery Terminals | 10 - 12 | Dielectric Grease |
17. The "Callahan 50" Maintenance Schedule
Don't wait for a failure. Follow this schedule to prevent 90% of the problems in this guide.
- Every 50 Hours: Check lower unit oil for milkiness.
- Every 100 Hours: Replace spark plugs and fuel/water separator filter.
- Every 300 Hours: Replace water pump impeller and thermostats.
- Every 500 Hours: Perform a compression test and check valve clearances.
18. Final Word: The Sea is the Ultimate Auditor
The ocean doesn't care about your excuses. It doesn't care that you "meant" to check the battery or that the kill switch "seemed" fine. It is the ultimate auditor of your mechanical preparation.
By using the Callahan Protocol, you are providing the ocean with the correct answers to its questions. You are ensuring that your vessel is a tool for adventure, not a liability for rescue.
I'll see you out there.